Atmospheric Blitz Blow Off Valve Rebuild Assembly and Seal |
Some people choose to block off the re-circulation valves entirely, which causes a boost spike and turbo flutter when you let off the throttle because the pressurized air has no where to go, so it travels backward through the pipework and reverse over the impeller blades of the turbo charger, which makes this sound:
Another approach is to fit a vent-to-atmosphere type of blow-off valve, which is what I have done. This set up is by far the most pleasing for pleasure driving, as it really makes the car sound fantastic, but it does have drawbacks as well. For instance, when you let off the throttle you will hear them venting in all their glory, but you also have a boost drop in between gear changes if the valves don't react quick enough. The other problem is again fuel related, because the ECU has measured that air entering the system, it will not be aware that the air has not gone into the engine, again causing a rich condition periodically between shifts, and can sometimes result in back-fire as the excess fuel is burned off in the exhaust.
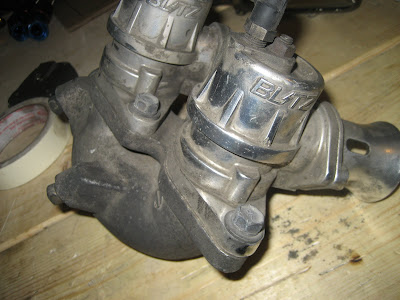
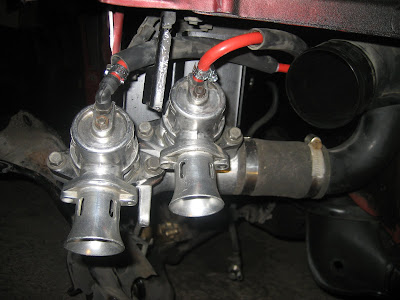
After one season of using my Blitz blow-off valves, I'd noticed they had become less responsive than they were originally, and after looking them over I could see they were in rough shape. They're situated normally in the drivers side front bumper vent, which actually acts as a perfect ducting system to funnel as much dirt as possible into the valve set up.
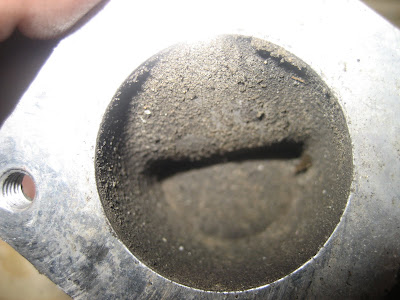
Needless to say, after removing them from the car and having a look inside the valves, it was clear why they were seizing up and not performing as well as they originally had. They had been completely covered in dirt, and each time the valve opened dirt would get inside and this eventually caused them to seize shut.
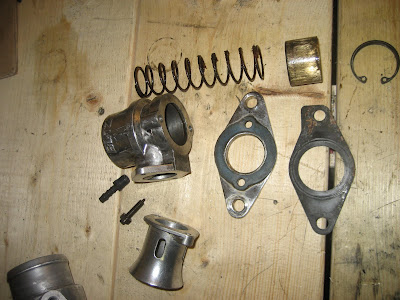
So I began with disassembly, it's quite straight forward, remove each valve from the bracket pipe, then using an Allen key you can remove the adapter, the trumpet and the gasket.
This next part is tricky, as you need to press the piston upwards into the chamber against the spring, and then use spring clip pliers to remove the circlip, then slowly release the piston, be careful with this part as the spring will want to launch it out into your face. One of mine came apart easily, the other one required some very delicate coaxing, as it was jammed in the partially open position. Since the pistons are made of brass, they are rather soft and easy to puncture, so use a material that is softer than brass and not pointed, like a block of wood. When I finally got it free, the piston's wall was scored from the dirt, so I cleaned and polished the interior of the chamber and the outside of the piston, this put the valves back into working order.
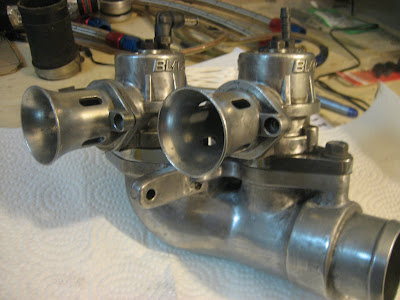
While everything was in bits and pieces, I gave the bracket pipe a good shine as well, and re-assembly is quite straight forward as well. Place the spring into the chamber, slide the piston in, and press it as far as it will go into the chamber. Install the circlip with pliers and make sure its seated properly before letting the spring push the piston out. Mount chambers onto the pipe with the gaskets sandwiched between.
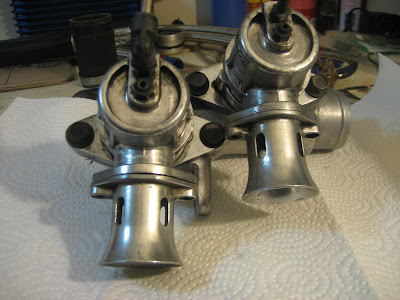
The end result was quite good, everything was properly sealed as I pressured tested the kit, and both valves were now working properly again. Some photos below of the polished kit.
But did It really make a difference?
ReplyDeleteActually yea it made a complete difference! I realized after they were re-installed that I one was not even opening before I over-hauled them.
ReplyDelete